Sentinel – 使用 Apollo 或 ZooKeeper 存储规则:多注册中心适配
👋 大家好,欢迎来到我的技术博客!
💻 作为一名热爱 Java 与软件开发的程序员,我始终相信:清晰的逻辑 + 持续的积累 = 稳健的成长。
📚 在这里,我会分享学习笔记、实战经验与技术思考,力求用简单的方式讲清楚复杂的问题。
🎯 本文将围绕Sentinel这个话题展开,希望能为你带来一些启发或实用的参考。
🌱 无论你是刚入门的新手,还是正在进阶的开发者,希望你都能有所收获!
文章目录
- Sentinel – 使用 Apollo 或 ZooKeeper 存储规则:多注册中心适配
-
- 🧩 一、为什么要支持多种注册中心?
-
- 🔍 现实场景
- 🎯 支持多注册中心的意义
- 🚀 二、环境准备与依赖
-
- 📦 Maven 依赖
- 🧪 三、使用 Apollo 存储规则
-
- 🧩 1. 启动 Apollo 服务
- 📄 2. 配置 Apollo 客户端
- 🧪 3. 在 Apollo 控制台添加规则
- 🧪 4. 测试 Apollo 集成
- 🧪 四、使用 ZooKeeper 存储规则
-
- 🧩 1. 启动 ZooKeeper 服务
- 📄 2. 配置 ZooKeeper 客户端
- 🧪 3. 在 ZooKeeper 中添加规则
- 🧪 4. 测试 ZooKeeper 集成
- 🔄 五、多注册中心适配策略
-
- 📌 1. 环境变量或配置文件切换
-
- 📄 application.yml (通用配置)
- 📄 application-apollo.yml
- 📄 application-zookeeper.yml
- 📄 application-nacos.yml
- 🧪 2. 启动时指定 Profile
- 🧪 3. 动态切换(高级)
- 📊 六、使用 Mermaid 图表展示多注册中心适配架构
- 🧪 七、代码示例:动态切换数据源
-
- 📄 动态数据源配置类
- 📄 application.yml (包含动态配置属性)
- 🧪 八、实战测试与验证
-
- 🧪 1. 测试 Apollo 配置
- 🧪 2. 测试 ZooKeeper 配置
- 🧪 3. 测试 Nacos 配置 (可选)
- 📚 九、总结与展望
-
- ✅ 本文亮点回顾
- 🚀 未来拓展方向
Sentinel – 使用 Apollo 或 ZooKeeper 存储规则:多注册中心适配
大家好!今天我们将深入探讨一个在微服务架构中至关重要的话题:使用 Apollo 或 ZooKeeper 存储 Sentinel 规则,并实现多注册中心适配。
在前一篇文章中,我们学习了如何将 Sentinel 与 Nacos 结合,实现规则的动态推送与持久化。然而,在实际生产环境中,团队可能已经部署了多种注册中心,比如 Apollo、ZooKeeper、Consul 等。为了满足不同场景的需求,我们需要让 Sentinel 支持多种配置中心,从而实现规则的灵活存储和管理。
本文将带你深入了解如何将 Sentinel 的规则存储从 Nacos 迁移到 Apollo 或 ZooKeeper,并展示如何通过统一的配置方式,让 Sentinel 能够适配不同的注册中心,从而提升系统的灵活性和可维护性。
🧩 一、为什么要支持多种注册中心?
🔍 现实场景
在企业级微服务架构中,不同的团队或项目可能会根据自身的技术栈和偏好选择不同的配置中心或服务注册中心。例如:
- Apollo:由携程开源,提供强大的配置管理能力,广泛应用于大型互联网公司。
- ZooKeeper:经典的分布式协调服务,常用于服务发现和配置管理。
- Consul:HashiCorp 开源的产品,提供服务发现、配置管理和多数据中心支持。
- Nacos:阿里巴巴开源,集服务发现与配置管理于一体,是 Spring Cloud 生态中的热门选择。
🎯 支持多注册中心的意义
- 技术栈灵活性:团队可以根据现有技术栈选择最适合的注册中心,而不是被迫迁移到某一特定方案。
- 平滑迁移:当需要更换配置中心时,无需改动应用代码,只需调整配置即可。
- 统一管理:如果同时使用多个注册中心,可以将 Sentinel 规则集中管理,避免分散。
- 高可用性:在某些场景下,通过支持多种注册中心,可以提高系统的容错能力。
🚀 二、环境准备与依赖
📦 Maven 依赖
为了实现与 Apollo 和 ZooKeeper 的集成,我们需要引入相应的依赖。
<?xml version="1.0" encoding="UTF-8"?>
<project xmlns="http://maven.apache.org/POM/4.0.0"
         xmlns:xsi="http://www.w3.org/2001/XMLSchema-instance"
         xsi:schemaLocation="http://maven.apache.org/POM/4.0.0 http://maven.apache.org/xsd/maven-4.0.0.xsd">
    <modelVersion>4.0.0</modelVersion>
    <groupId>com.example</groupId>
    <artifactId>sentinel-apollo-zookeeper-demo</artifactId>
    <version>0.0.1-SNAPSHOT</version>
    <name>sentinel-apollo-zookeeper-demo</name>
    <description>Demo project for Sentinel with Apollo or ZooKeeper</description>
    <parent>
        <groupId>org.springframework.boot</groupId>
        <artifactId>spring-boot-starter-parent</artifactId>
        <version>2.7.0</version> <!-- 请根据实际情况选择合适的版本 -->
        <relativePath/> <!-- lookup parent from repository -->
    </parent>
    <properties>
        <java.version>1.8</java.version>
        <spring-cloud.version>2021.0.3</spring-cloud.version>
        <sentinel.version>1.8.6</sentinel.version>
    </properties>
    <dependencies>
        <dependency>
            <groupId>org.springframework.boot</groupId>
            <artifactId>spring-boot-starter-web</artifactId>
        </dependency>
        <!-- Sentinel 核心依赖 -->
        <dependency>
            <groupId>com.alibaba.csp</groupId>
            <artifactId>sentinel-core</artifactId>
            <version>${sentinel.version}</version>
        </dependency>
        <!-- Sentinel 注解支持 -->
        <dependency>
            <groupId>com.alibaba.csp</groupId>
            <artifactId>sentinel-annotation-aspectj</artifactId>
            <version>${sentinel.version}</version>
        </dependency>
        <!-- Sentinel Apollo 扩展 -->
        <dependency>
            <groupId>com.alibaba.csp</groupId>
            <artifactId>sentinel-datasource-apollo</artifactId>
            <version>${sentinel.version}</version>
        </dependency>
        <!-- Sentinel ZooKeeper 扩展 -->
        <dependency>
            <groupId>com.alibaba.csp</groupId>
            <artifactId>sentinel-datasource-zookeeper</artifactId>
            <version>${sentinel.version}</version>
        </dependency>
        <!-- Spring Cloud Alibaba Nacos Discovery (如果需要) -->
        <!--
        <dependency>
            <groupId>com.alibaba.cloud</groupId>
            <artifactId>spring-cloud-starter-alibaba-nacos-discovery</artifactId>
            <version>2021.0.4.0</version>
        </dependency>
        -->
        <!-- Spring Cloud Alibaba Nacos Config (如果需要) -->
        <!--
        <dependency>
            <groupId>com.alibaba.cloud</groupId>
            <artifactId>spring-cloud-starter-alibaba-nacos-config</artifactId>
            <version>2021.0.4.0</version>
        </dependency>
        -->
        <!-- 如果你的项目是 Spring Cloud 项目,且使用了 Spring Cloud LoadBalancer,可能需要这个依赖 -->
        <!--
        <dependency>
            <groupId>org.springframework.cloud</groupId>
            <artifactId>spring-cloud-loadbalancer</artifactId>
        </dependency>
        -->
        <dependency>
            <groupId>org.springframework.boot</groupId>
            <artifactId>spring-boot-starter-test</artifactId>
            <scope>test</scope>
        </dependency>
    </dependencies>
    <dependencyManagement>
        <dependencies>
            <dependency>
                <groupId>org.springframework.cloud</groupId>
                <artifactId>spring-cloud-dependencies</artifactId>
                <version>${spring-cloud.version}</version>
                <type>pom</type>
                <scope>import</scope>
            </dependency>
        </dependencies>
    </dependencyManagement>
    <build>
        <plugins>
            <plugin>
                <groupId>org.springframework.boot</groupId>
                <artifactId>spring-boot-maven-plugin</artifactId>
            </plugin>
        </plugins>
    </build>
</project>
关键依赖说明:
-
sentinel-datasource-apollo:用于与 Apollo 集成。 -
sentinel-datasource-zookeeper:用于与 ZooKeeper 集成。 -
sentinel-core和sentinel-annotation-aspectj:基础依赖。
🧪 三、使用 Apollo 存储规则
🧩 1. 启动 Apollo 服务
首先,你需要启动 Apollo 服务。可以通过官方提供的 Apollo 快速入门指南 来安装和启动。
📄 2. 配置 Apollo 客户端
在 application.yml 中配置 Apollo 客户端信息。
server:
  port: 8080
spring:
  application:
    name: sentinel-apollo-demo # 应用名称
# Apollo 配置
apollo:
  meta: http://localhost:8080 # Apollo Meta Server 地址
  app.id: sentinel-apollo-demo # 应用 ID
  cluster: default # 集群名称
  namespace: application # 命名空间名称
# Sentinel 配置 (Apollo)
spring:
  cloud:
    sentinel:
      transport:
        dashboard: localhost:8080 # Sentinel 控制台地址 (可选)
        port: 8080 # Sentinel 客户端向 Dashboard 发送心跳的端口 (可选)
      datasource:
        # 配置流控规则数据源为 Apollo
        flow:
          apollo:
            namespace: application # Apollo 命名空间名称
            flow-rules-key: sentinel-flow-rules # Apollo 配置项 Key
            rule-type: flow
        # 配置熔断规则数据源为 Apollo
        degrade:
          apollo:
            namespace: application
            degrade-rules-key: sentinel-degrade-rules
            rule-type: degrade
        # 配置系统规则数据源为 Apollo
        system:
          apollo:
            namespace: application
            system-rules-key: sentinel-system-rules
            rule-type: system
        # 配置热点参数规则数据源为 Apollo
        param-flow:
          apollo:
            namespace: application
            param-flow-rules-key: sentinel-param-flow-rules
            rule-type: param-flow
        # 配置授权规则数据源为 Apollo
        authority:
          apollo:
            namespace: application
            authority-rules-key: sentinel-authority-rules
            rule-type: authority
management:
  endpoints:
    web:
      exposure:
        include: '*'
🧪 3. 在 Apollo 控制台添加规则
- 登录 Apollo 控制台 (
http://localhost:8080)。 - 选择你的应用
sentinel-apollo-demo。 - 选择
application命名空间。 - 点击 + 新建配置。
- 创建以下配置项:
-
Key:
sentinel-flow-rules,Value: (填入 JSON 格式的流控规则)[ { "resource": "demoResource", "limitApp": "default", "count": 1, "grade": 1, "strategy": 0, "controlBehavior": 0, "clusterMode": false } ] -
Key:
sentinel-degrade-rules,Value: (填入 JSON 格式的熔断规则)[ { "resource": "demoResource", "grade": 1, "count": 0.1, "timeWindow": 10, "minRequestAmount": 10, "statIntervalMs": 1000 } ] -
Key:
sentinel-system-rules,Value: (填入 JSON 格式的系统规则)[ { "mode": 1, "threshold": 0.7 } ] -
Key:
sentinel-param-flow-rules,Value: (填入 JSON 格式的热点参数规则)[ { "resource": "demoResource", "limitApp": "default", "count": 1, "grade": 1, "paramIdx": 0, "controlBehavior": 0, "clusterMode": false } ] -
Key:
sentinel-authority-rules,Value: (填入 JSON 格式的授权规则)[ { "resource": "demoResource", "limitApp": "default", "strategy": 0 } ]
-
Key:
🧪 4. 测试 Apollo 集成
启动你的 Spring Boot 应用,并访问接口:
http://localhost:8080/demo?name=Test
如果一切配置正确,Sentinel 会自动从 Apollo 获取规则并生效。
🧪 四、使用 ZooKeeper 存储规则
🧩 1. 启动 ZooKeeper 服务
你可以通过 Apache ZooKeeper 官网 下载并启动 ZooKeeper 服务。
📄 2. 配置 ZooKeeper 客户端
在 application.yml 中修改配置,将数据源指向 ZooKeeper。
server:
  port: 8080
spring:
  application:
    name: sentinel-zookeeper-demo # 应用名称
# Sentinel 配置 (ZooKeeper)
spring:
  cloud:
    sentinel:
      transport:
        dashboard: localhost:8080 # Sentinel 控制台地址 (可选)
        port: 8080 # Sentinel 客户端向 Dashboard 发送心跳的端口 (可选)
      datasource:
        # 配置流控规则数据源为 ZooKeeper
        flow:
          zookeeper:
            server-addr: localhost:2181 # ZooKeeper 地址
            path: /sentinel/rules/flow # ZooKeeper 中的路径
            rule-type: flow
        # 配置熔断规则数据源为 ZooKeeper
        degrade:
          zookeeper:
            server-addr: localhost:2181
            path: /sentinel/rules/degrade
            rule-type: degrade
        # 配置系统规则数据源为 ZooKeeper
        system:
          zookeeper:
            server-addr: localhost:2181
            path: /sentinel/rules/system
            rule-type: system
        # 配置热点参数规则数据源为 ZooKeeper
        param-flow:
          zookeeper:
            server-addr: localhost:2181
            path: /sentinel/rules/param-flow
            rule-type: param-flow
        # 配置授权规则数据源为 ZooKeeper
        authority:
          zookeeper:
            server-addr: localhost:2181
            path: /sentinel/rules/authority
            rule-type: authority
management:
  endpoints:
    web:
      exposure:
        include: '*'
🧪 3. 在 ZooKeeper 中添加规则
ZooKeeper 中的规则需要以特定的格式存储在指定路径下。
- 连接到 ZooKeeper CLI (
zkCli.sh -server localhost:2181)。 - 创建节点并添加规则数据:
- 创建根节点
/sentinel(如果不存在):create /sentinel "" - 创建规则子节点
/sentinel/rules:create /sentinel/rules "" - 创建流控规则节点
/sentinel/rules/flow并设置其值为 JSON 格式的规则:create /sentinel/rules/flow "[{\"resource\":\"demoResource\",\"limitApp\":\"default\",\"count\":1,\"grade\":1,\"strategy\":0,\"controlBehavior\":0,\"clusterMode\":false}]" - 类似地,创建熔断、系统、热点参数和授权规则的节点。
- 创建根节点
🧪 4. 测试 ZooKeeper 集成
启动你的 Spring Boot 应用,并访问接口:
http://localhost:8080/demo?name=Test
如果一切配置正确,Sentinel 会自动从 ZooKeeper 获取规则并生效。
🔄 五、多注册中心适配策略
📌 1. 环境变量或配置文件切换
最常见的方式是通过环境变量或配置文件来决定使用哪种数据源。
📄 application.yml (通用配置)
server:
  port: 8080
spring:
  application:
    name: sentinel-multi-center-demo # 应用名称
# Sentinel 配置
spring:
  cloud:
    sentinel:
      transport:
        dashboard: localhost:8080 # Sentinel 控制台地址 (可选)
        port: 8080 # Sentinel 客户端向 Dashboard 发送心跳的端口 (可选)
      datasource:
        # 根据 profile 加载不同的数据源
        flow:
          # 以下配置将在不同 profile 中覆盖
          # 例如: apollo, zookeeper, nacos
        degrade:
          # ...
        system:
          # ...
        param-flow:
          # ...
        authority:
          # ...
management:
  endpoints:
    web:
      exposure:
        include: '*'
📄 application-apollo.yml
spring:
  cloud:
    sentinel:
      datasource:
        flow:
          apollo:
            namespace: application
            flow-rules-key: sentinel-flow-rules
            rule-type: flow
        degrade:
          apollo:
            namespace: application
            degrade-rules-key: sentinel-degrade-rules
            rule-type: degrade
        system:
          apollo:
            namespace: application
            system-rules-key: sentinel-system-rules
            rule-type: system
        param-flow:
          apollo:
            namespace: application
            param-flow-rules-key: sentinel-param-flow-rules
            rule-type: param-flow
        authority:
          apollo:
            namespace: application
            authority-rules-key: sentinel-authority-rules
            rule-type: authority
📄 application-zookeeper.yml
spring:
  cloud:
    sentinel:
      datasource:
        flow:
          zookeeper:
            server-addr: localhost:2181
            path: /sentinel/rules/flow
            rule-type: flow
        degrade:
          zookeeper:
            server-addr: localhost:2181
            path: /sentinel/rules/degrade
            rule-type: degrade
        system:
          zookeeper:
            server-addr: localhost:2181
            path: /sentinel/rules/system
            rule-type: system
        param-flow:
          zookeeper:
            server-addr: localhost:2181
            path: /sentinel/rules/param-flow
            rule-type: param-flow
        authority:
          zookeeper:
            server-addr: localhost:2181
            path: /sentinel/rules/authority
            rule-type: authority
📄 application-nacos.yml
spring:
  cloud:
    sentinel:
      datasource:
        flow:
          nacos:
            server-addr: localhost:8848
            group-id: SENTINEL_GROUP
            data-id: ${spring.application.name}-flow.json
            rule-type: flow
        degrade:
          nacos:
            server-addr: localhost:8848
            group-id: SENTINEL_GROUP
            data-id: ${spring.application.name}-degrade.json
            rule-type: degrade
        system:
          nacos:
            server-addr: localhost:8848
            group-id: SENTINEL_GROUP
            data-id: ${spring.application.name}-system.json
            rule-type: system
        param-flow:
          nacos:
            server-addr: localhost:8848
            group-id: SENTINEL_GROUP
            data-id: ${spring.application.name}-param-flow.json
            rule-type: param-flow
        authority:
          nacos:
            server-addr: localhost:8848
            group-id: SENTINEL_GROUP
            data-id: ${spring.application.name}-authority.json
            rule-type: authority
🧪 2. 启动时指定 Profile
# 启动时指定使用 Apollo 配置
java -jar sentinel-multi-center-demo.jar --spring.profiles.active=apollo
# 启动时指定使用 ZooKeeper 配置
java -jar sentinel-multi-center-demo.jar --spring.profiles.active=zookeeper
# 启动时指定使用 Nacos 配置
java -jar sentinel-multi-center-demo.jar --spring.profiles.active=nacos
🧪 3. 动态切换(高级)
对于更复杂的场景,可以实现一个配置中心管理服务,通过 API 动态地更改应用使用的配置中心。但这需要额外的开发工作。
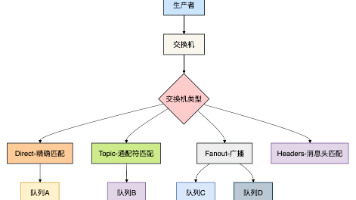
📊 六、使用 Mermaid 图表展示多注册中心适配架构
下面是一个使用 Mermaid 图表展示 Sentinel 多注册中心适配架构的示意图。
渲染错误: Mermaid 渲染失败: Parse error on line 8: … D –> H[Consul (Not Shown)] su ———————-^ Expecting 'SQE', 'DOUBLECIRCLEEND', 'PE', '-)', 'STADIUMEND', 'SUBROUTINEEND', 'PIPE', 'CYLINDEREND', 'DIAMOND_STOP', 'TAGEND', 'TRAPEND', 'INVTRAPEND', 'UNICODE_TEXT', 'TEXT', 'TAGSTART', got 'PS'
这个图表展示了 Sentinel 与不同配置中心(Apollo, ZooKeeper, Nacos)之间的关系。通过统一的 Sentinel Client,我们可以灵活地切换底层的数据源。
🧪 七、代码示例:动态切换数据源
虽然上面通过配置文件切换是最常用的方式,但如果你想在代码层面动态控制,也可以这样做。
📄 动态数据源配置类
package com.example.sentinel.multi.center.demo.config;
import com.alibaba.csp.sentinel.datasource.Converter;
import com.alibaba.csp.sentinel.datasource.ReadableDataSource;
import com.alibaba.csp.sentinel.datasource.apollo.ApolloDataSource;
import com.alibaba.csp.sentinel.datasource.zookeeper.ZookeeperDataSource;
import com.alibaba.csp.sentinel.slots.block.flow.FlowRule;
import com.alibaba.csp.sentinel.slots.block.flow.FlowRuleManager;
import com.alibaba.fastjson.JSON;
import com.alibaba.fastjson.TypeReference;
import org.slf4j.Logger;
import org.slf4j.LoggerFactory;
import org.springframework.beans.factory.annotation.Value;
import org.springframework.context.annotation.Bean;
import org.springframework.context.annotation.Configuration;
import org.springframework.core.env.Environment;
import javax.annotation.PostConstruct;
import java.util.List;
@Configuration
public class DynamicDataSourceConfig {
    private static final Logger logger = LoggerFactory.getLogger(DynamicDataSourceConfig.class);
    @Value("${sentinel.datasource.type:apollo}") // 默认使用 Apollo
    private String dataSourceType;
    @Value("${sentinel.datasource.apollo.namespace:application}")
    private String apolloNamespace;
    @Value("${sentinel.datasource.apollo.flow.rules.key:sentinel-flow-rules}")
    private String apolloFlowRulesKey;
    @Value("${sentinel.datasource.zookeeper.server.addr:localhost:2181}")
    private String zkServerAddr;
    @Value("${sentinel.datasource.zookeeper.path:/sentinel/rules/flow}")
    private String zkPath;
    @Value("${spring.application.name}")
    private String appName;
    @Value("${spring.profiles.active:apollo}") // 优先级低于配置文件
    private String activeProfile;
    @PostConstruct
    public void init() {
        logger.info("Initializing Sentinel DataSource based on type: {}", dataSourceType);
        switch (dataSourceType.toLowerCase()) {
            case "apollo":
                initApolloDataSource();
                break;
            case "zookeeper":
                initZookeeperDataSource();
                break;
            default:
                logger.warn("Unknown data source type '{}'. Defaulting to Apollo.", dataSourceType);
                initApolloDataSource(); // 默认使用 Apollo
        }
    }
    private void initApolloDataSource() {
        logger.info("Initializing Apollo DataSource for flow rules.");
        String apolloServerUrl = "http://localhost:8080"; // 请替换为实际的 Apollo Meta URL
        String appId = this.appName; // 通常与 spring.application.name 一致
        String cluster = "default";
        ReadableDataSource<String, List<FlowRule>> flowRuleDataSource =
                new ApolloDataSource<>(apolloServerUrl, appId, cluster, apolloNamespace, apolloFlowRulesKey,
                        new Converter<String, List<FlowRule>>() {
                            @Override
                            public List<FlowRule> convert(String source) {
                                logger.info("Received flow rules from Apollo: {}", source);
                                return JSON.parseObject(source, new TypeReference<List<FlowRule>>() {});
                            }
                        });
        FlowRuleManager.register2Property(flowRuleDataSource.getProperty());
        logger.info("Flow rules loaded from Apollo successfully.");
    }
    private void initZookeeperDataSource() {
        logger.info("Initializing ZooKeeper DataSource for flow rules.");
        // 注意:ZooKeeper 的路径通常包含完整的规则路径,这里简化处理
        ReadableDataSource<String, List<FlowRule>> flowRuleDataSource =
                new ZookeeperDataSource<>(zkServerAddr, zkPath,
                        new Converter<String, List<FlowRule>>() {
                            @Override
                            public List<FlowRule> convert(String source) {
                                logger.info("Received flow rules from ZooKeeper: {}", source);
                                return JSON.parseObject(source, new TypeReference<List<FlowRule>>() {});
                            }
                        });
        FlowRuleManager.register2Property(flowRuleDataSource.getProperty());
        logger.info("Flow rules loaded from ZooKeeper successfully.");
    }
    // 可以添加其他规则类型的数据源初始化方法,如 degrade, system 等
    // 例如:
    /*
    private void initZookeeperDegradeDataSource() {
        // ... 类似 initZookeeperDataSource ...
    }
    */
}
📄 application.yml (包含动态配置属性)
server:
  port: 8080
spring:
  application:
    name: sentinel-multi-center-demo
# Sentinel 配置 (通用)
spring:
  cloud:
    sentinel:
      transport:
        dashboard: localhost:8080
        port: 8080
# 动态数据源配置 (可通过外部属性或环境变量修改)
sentinel:
  datasource:
    type: apollo # 可选值: apollo, zookeeper, nacos
    apollo:
      namespace: application
      flow:
        rules:
          key: sentinel-flow-rules
    zookeeper:
      server:
        addr: localhost:2181
      path: /sentinel/rules/flow
management:
  endpoints:
    web:
      exposure:
        include: '*'
注意:
- 这个示例通过
@PostConstruct在应用启动时根据sentinel.datasource.type属性初始化相应的数据源。 -
@Value注解用于读取配置属性,可以来自application.yml、环境变量或 JVM 参数。 -
initApolloDataSource和initZookeeperDataSource方法分别负责初始化对应的DataSource。 - 这种方式虽然灵活,但在实际生产中,通常还是推荐使用配置文件或 Profile 的方式来切换。
🧪 八、实战测试与验证
🧪 1. 测试 Apollo 配置
- 确保 Apollo 服务已启动。
- 在 Apollo 控制台中创建上述提到的规则配置项。
- 启动应用时指定
--spring.profiles.active=apollo。 - 访问
http://localhost:8080/demo?name=Test。 - 验证规则是否生效(如触发限流)。
🧪 2. 测试 ZooKeeper 配置
- 确保 ZooKeeper 服务已启动。
- 在 ZooKeeper 中创建规则节点并写入 JSON 数据。
- 启动应用时指定
--spring.profiles.active=zookeeper。 - 访问
http://localhost:8080/demo?name=Test。 - 验证规则是否生效。
🧪 3. 测试 Nacos 配置 (可选)
如果你有 Nacos 环境,可以按照前文介绍的方式,创建 application-nacos.yml 配置文件,并测试其功能。
📚 九、总结与展望
通过本文的学习,我们深入探讨了如何将 Sentinel 的规则存储从单一的 Nacos 方式,扩展为支持 Apollo 和 ZooKeeper 等多种注册中心的配置方式。这种设计极大地增强了系统的灵活性和适应性。
✅ 本文亮点回顾
-
多种注册中心支持:介绍了如何使用
sentinel-datasource-apollo和sentinel-datasource-zookeeper依赖来实现与 Apollo 和 ZooKeeper 的集成。 - 配置文件切换策略:通过 Spring Boot 的 Profile 机制,实现了在不同环境之间轻松切换数据源。
-
代码层面动态控制:展示了如何在代码中通过
@PostConstruct和@Value注解动态初始化数据源。 - 实战演练:提供了完整的配置示例和测试步骤,便于读者动手实践。
- 可视化架构图:使用 Mermaid 图表清晰地展示了多注册中心适配的架构。
🚀 未来拓展方向
- 多配置中心并存:在复杂环境中,可以考虑同时使用多个配置中心来管理不同类型或不同层级的规则。
- 配置中心抽象层:开发一个通用的配置中心抽象层,让 Sentinel 更加模块化,易于扩展新的数据源。
- 与 Spring Cloud Config 结合:探索与 Spring Cloud Config 的集成,实现统一的配置管理。
- 自动化规则同步:实现从一个配置中心同步规则到另一个配置中心的功能,提升运维效率。
- 安全增强:在生产环境中,加强与配置中心的安全认证和授权机制。
希望这篇文章能帮助你更好地理解和应用 Sentinel 多注册中心适配方案。如果你有任何问题或建议,欢迎在评论区留言交流!😊
参考链接:
- Sentinel GitHub 仓库
- Apollo GitHub 仓库
- Apache ZooKeeper 官网
- Spring Cloud Alibaba 官方文档
- Sentinel 官方文档
🙌 感谢你读到这里!
🔍 技术之路没有捷径,但每一次阅读、思考和实践,都在悄悄拉近你与目标的距离。
💡 如果本文对你有帮助,不妨 👍 点赞、📌 收藏、📤 分享 给更多需要的朋友!
💬 欢迎在评论区留下你的想法、疑问或建议,我会一一回复,我们一起交流、共同成长 🌿
🔔 关注我,不错过下一篇干货!我们下期再见!✨
© 版权声明
文章版权归作者所有,未经允许请勿转载。